Help Center · Stories and clips
Building clips in the studio
You do not need an editing suite. In the editor you build a clip right in the browser: background, text, filter, tools, inserted pictures and music. The result lands in the library as a perfectly normal clip and can be used in stories like any other. The format is always 9:16, the length up to 90 seconds. The editor comes with the Team plan and above.
Starting a clip
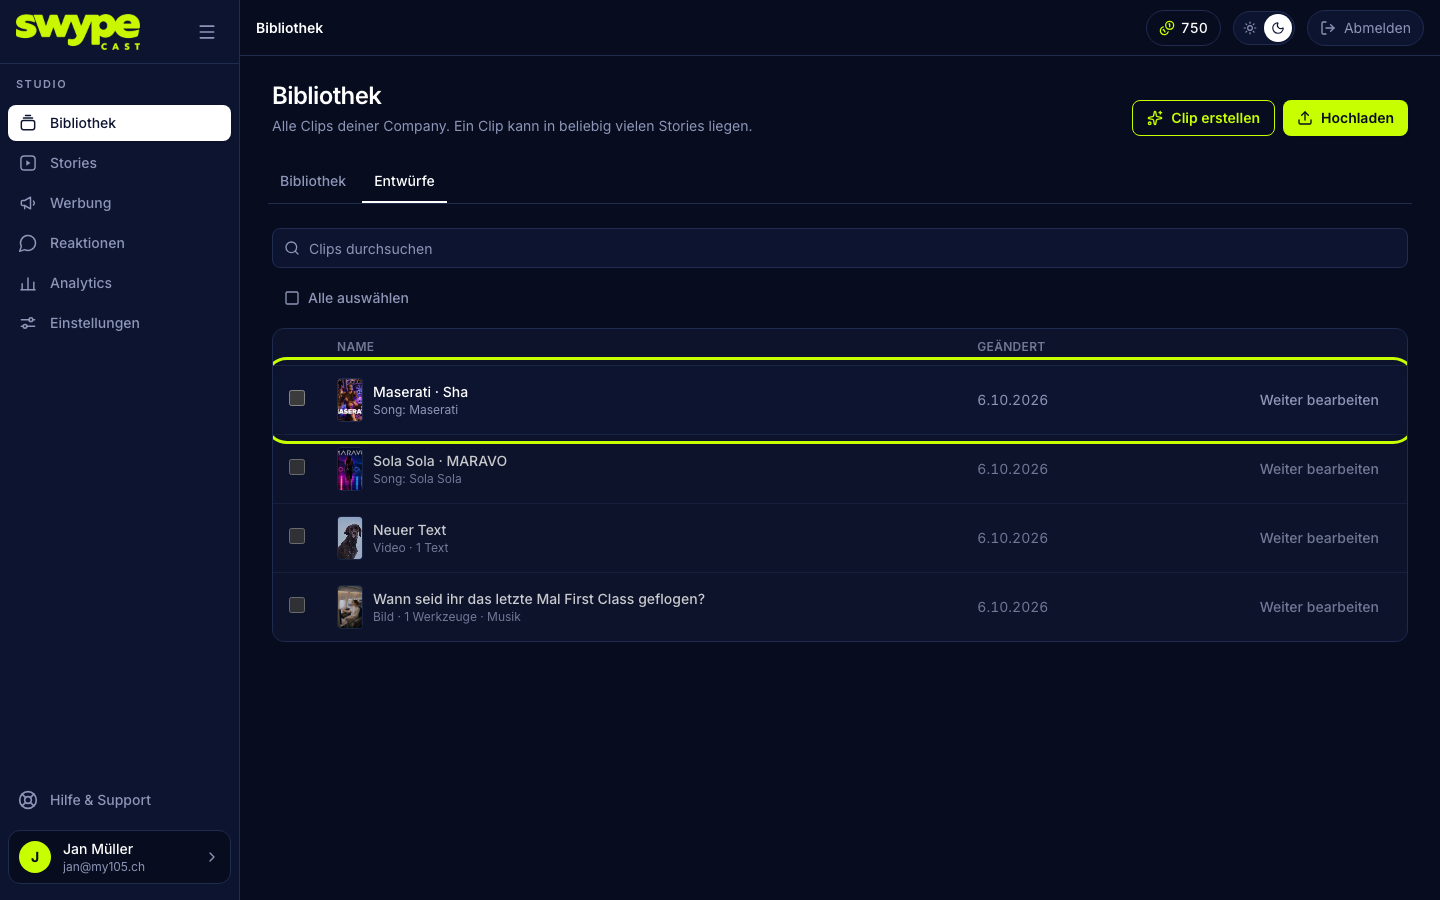
- Open Library and click Create a clip at the top. The editor opens right away; there is only one kind of clip.
- If your plan includes AI generation, SwypeCast asks first: Create by hand (colour, picture or video) or Create with AI (generate from a sentence), see Creating clips with AI.
- Give the clip a name at the top. Leave it as it is and SwypeCast names the clip after its content, for example after the first line of text. Everything saves itself while you work. When you leave, a short note confirms the draft is saved.
- Clips you started are in the library under Drafts. One click opens them in the editor again.
Every finished clip can also be reworked in the editor: the Editor button in the library or Edit in the editor on the clip page opens it. For an uploaded clip, its video (or picture and sound) becomes the background.
The editor
On the left is the stage, on the right the inspector with the tabs Background, Text, Filter, Tools, Insert, Music and Publishing. The header holds the name, Undo and Redo (⌘Z and ⇧⌘Z) and Create the clip.
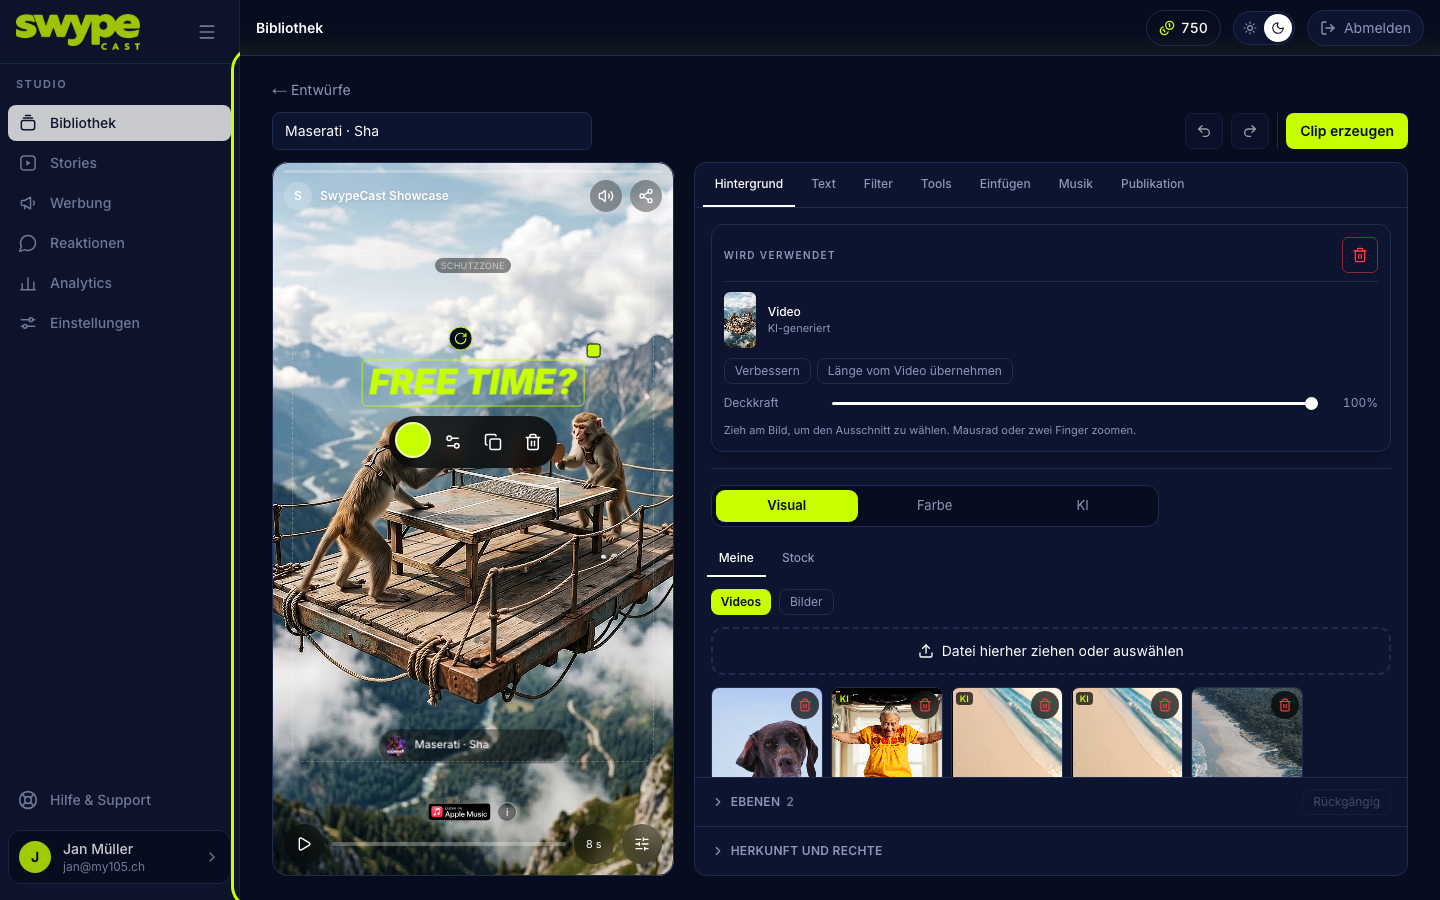
The stage is the player. It shows the clip as it will run later, with your organisation's picture and name at the top. At the bottom you play it with the play button and jump anywhere on the timeline. Beside it are two round buttons: the time (the clip's length while it stands, the running time while it plays; a click opens the length setting with presets from 10 to 90 seconds) and the mixer with one slider per sound source. At the top right you switch the sound on or off. The dashed frame is the safe zone: the player lays its own interface over it, so important content belongs in the middle.
Every element on the stage has the same grips. One click selects a text, an inserted medium, a tool or the music label: a frame surrounds the element, above it on a stalk sits the turn grip, at the top right corner the small square for growing and shrinking, and right under the element a toolbar: the colour dot at the far left (where the element has a colour), then settings (opens the matching tab), the crop for media, duplicate and delete. Dragging moves the element, a double click opens its settings. When there is no room below, the toolbar stands above the element. More under Layers, selection and undo.
At the foot of the inspector you unfold Layers (everything on the clip, to select, reorder and delete) and Origin and rights (where picture, video and sound come from).
On a phone
On a phone the clip fills the whole screen. The tools sit as round buttons on the right edge: background, text, tools, insert, music and More (filter, publishing, layers, origin, undo and redo). A tap opens the tool as a sheet from below; the arrow at the top right of the sheet or a swipe down closes it. At the top left the × takes you back to the drafts. The round arrow at the bottom right leads to the finish: name, length, stories and Create the clip. Details under The editor on a phone.
Background
At the top of the tab stands what currently serves as background, with its controls: Reset the cut-out, Take the length from the video, Opacity, Colour behind and Remove. Below it the three sources:
- Visual: under Mine your own pictures and videos (at the top the row for uploading: drop a file here or choose one, on a phone from your photos), under Stock pictures and videos from Pixabay (free for commercial use). What you pick from Stock is copied into your library. Videos come before pictures.
- Colour: a single colour or a gradient with up to five colours. The brand colours from Settings → Player come first. New clips start on a gradient.
- AI: a still picture or a video from a description, only with AI generation in your plan.
You adjust a picture or video right on the stage: dragging moves the cut-out, the mouse wheel or two fingers zoom towards the cursor or the fingers. A picture zoomed out lies on the colour behind. If a video is shorter than the clip, the editor asks once whether the length should follow. A video over 90 seconds is trimmed, a large file made smaller, and a note tells you what happened.
Text, filter, tools and insert
- Text: you write in the Text tab and set font, size, colour and more there; on the stage you move, turn and scale the text.
- Filter: ten presets and sliders for brightness, contrast, saturation, warmth, vignette, grain and blur.
- Insert: stickers, your own pictures, GIFs and videos, and stock pictures over the background.
- Tools: interactive elements such as vote, poll, question, barometer, countdown, link, location and prize draw. They are never rendered into the video; the player lays them over it.
Details are under Text, filter and insert, Tools on a clip and Prize draw on a clip.
Music
In the Music tab you choose the soundtrack. If one is already on the clip, it stands at the top as a card with name, origin and passage; Choose another and the bin stand beside it. Without a soundtrack you see the sources:
- Uploads: your own soundtracks and the ones from the AI, plus the row for uploading an audio file, a whole song if you like (up to 45 MB).
- Stock Music: a curated selection of free songs by Kevin MacLeod (incompetech.com) under CC BY 4.0. Search by title, mood or instrument, filter by genre and mood, listen with Listen and take the song with Use. The player names author and licence by itself via the info button.
- iTunes: only if enabled for your organisation, see Music from iTunes.
- AI: a generated soundtrack, only with AI generation in your plan.
A freshly chosen song opens the passage window: the waveform shows the whole song, the two handles trim front and back, you move the passage as a whole, the From and To fields or the arrow keys on a handle are more precise, and the space bar starts and stops. Insert takes the passage. It is at most as long as the clip; if shorter, it repeats until the end. The volume of the soundtrack and, with a video, the video's sound are set in the tab or via the mixer beside the timeline, audible at once, on a phone too.
Publishing
In the Publishing tab you choose which stories the clip should be in. It is appended at the end when created. Stories that already hold it are marked included. Without a tick the clip lives only in the library.
Creating the clip
Click Create the clip. The clip is rendered in your browser, so the tab has to stay open. Then it is uploaded and processed, and you get the link Open in the library. If something is still missing, for example the question of a vote, the button is locked and tells you what.
The draft stays. You can open it later and change it. Create it again replaces the video of the existing clip after a confirmation; stories keep their place.