Help Center · Stories and clips
Layers, selection and undo
Every text, every inserted medium and every tool is a layer of its own. Here is how you take hold of layers, order them, move several at once, take steps back and adjust the background.
Where to find it
The grips and the toolbar appear on every selected element on the stage. Layers are at the foot of the inspector in the editor, to the right of the stage; a click on the strip unfolds the list. Undo and Redo are at the top in the header.
Taking hold of an element
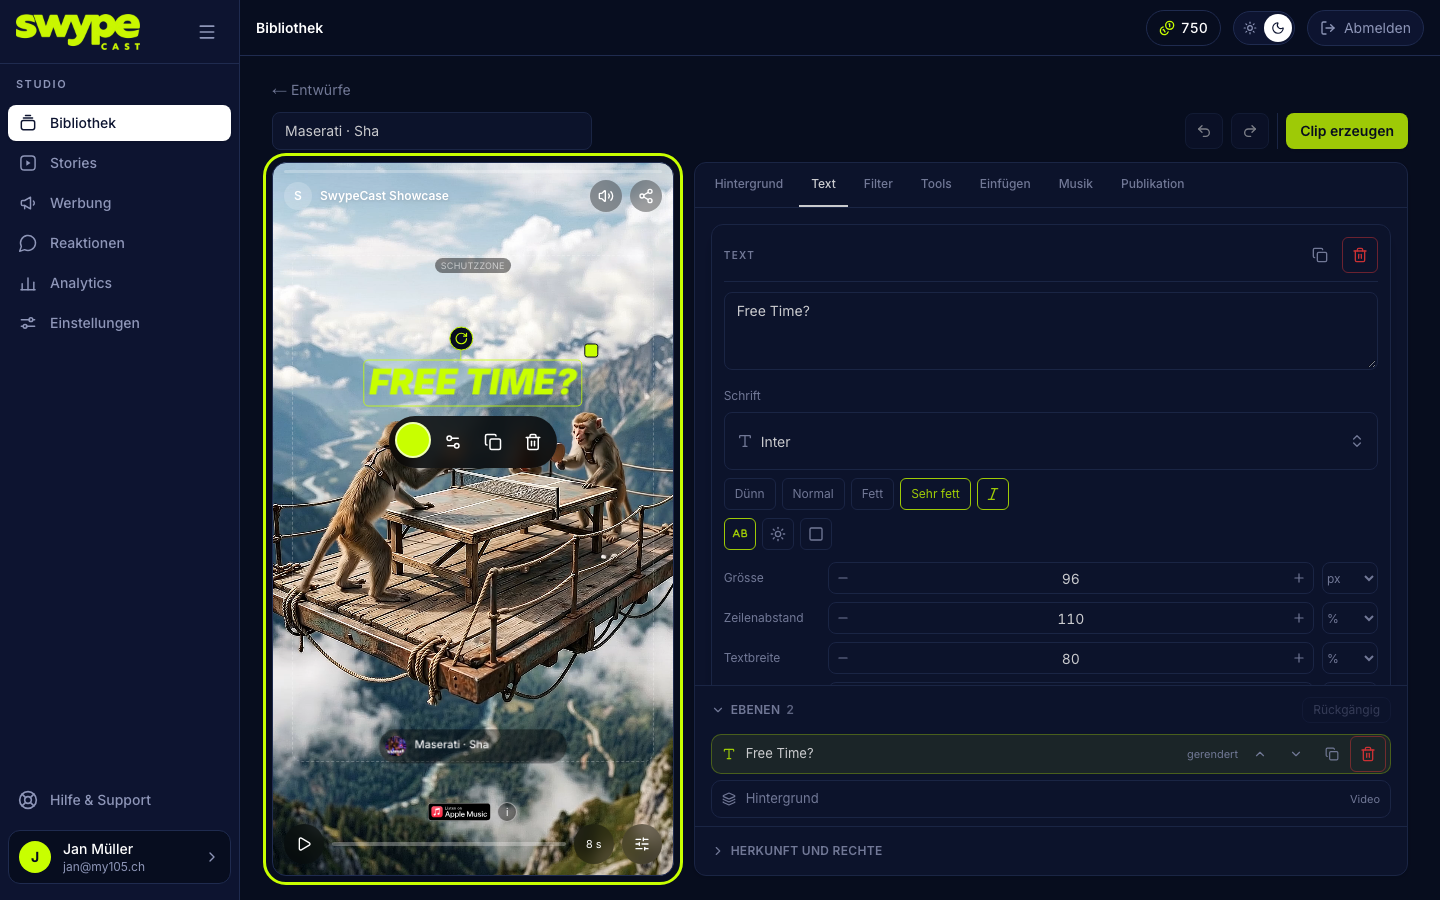
A click on an element selects it. All elements share the same grips:
- The frame shows the selection. Dragging the element moves it; while moving, guides appear and the element snaps to the centre.
- The turn grip sits on the short stalk above the middle of the frame. It snaps at 0 degrees.
- The small square at the top right corner changes the size. For text the type grows, for media and tools the width, and for tools the buttons and spacing grow along.
- The toolbar lies right under the element and moves with it: the colour dot at the far left (for text and for tools with a coloured surface), then Settings (opens the element's tab), the crop for media, then Duplicate and Delete. When there is no room below, the toolbar stands above the element; it never disappears under the keyboard or the menu bar.
- A double click on an element opens its tab, a double click on the empty ground the Background tab.
The grips are always the same size on screen, whatever the scale of the stage or a tool, and they have an invisible touch area so a finger hits them reliably on a phone.
The layer list
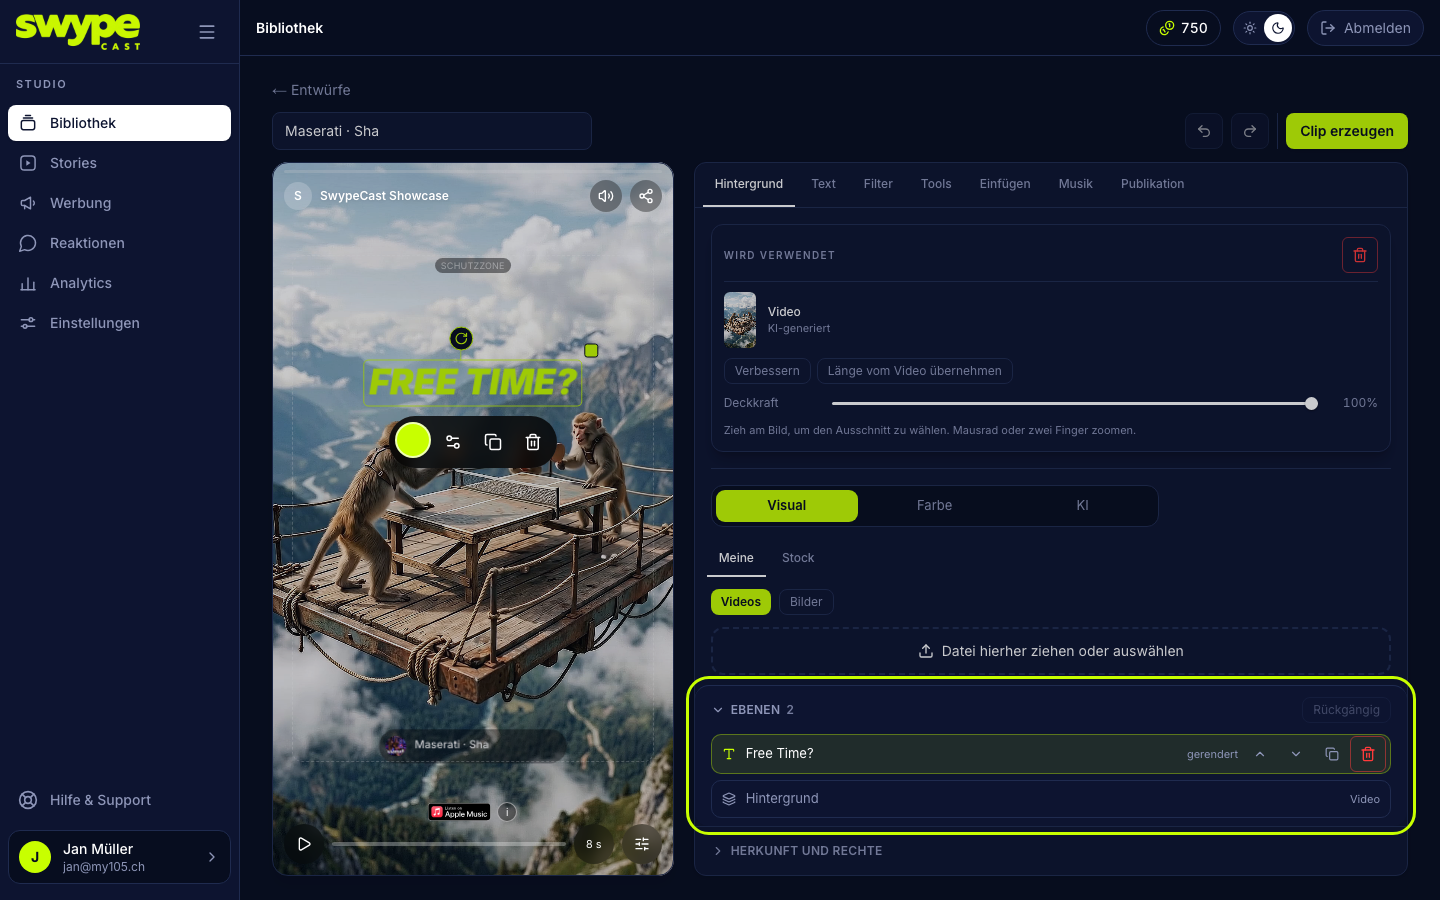
- Click Layers to unfold the list. The frontmost layer is at the top, the background at the very bottom.
- Click a row to select the layer. The matching tab opens (Text, Insert or Tools).
- The selected row shows Bring forward, Send back, Duplicate and Remove layer.
- On the right of each row it says what becomes of the layer: rendered means it is in the video. Layer in the player means the player lays it over the video. That applies to all tools.
Several layers at once
- ⌘-click (Windows: Ctrl-click) on the stage or in the list adds a layer to the selection.
- ⌘A selects all layers.
- Dragging moves the whole selection by the same distance.
- The arrow keys nudge the selection, in large steps with Shift.
- Delete or Backspace removes everything selected.
Turning and scaling work for a single layer only. A group shows just its frame.
Undo and redo
Undo (⌘Z) takes the last step back, Redo (⇧⌘Z) brings it back. This covers everything in the clip: layers, background, filter and sound. In a text field the shortcuts apply to the field itself. On a phone both are behind More.
Adjusting the background
If the background is a picture or a video, you choose the cut-out right on the stage:
- Drag on an empty spot of the stage to move the picture.
- Zoom with the mouse wheel, on a phone with two fingers. Zooming goes towards the cursor or the fingers; with two fingers you move at the same time.
- Reset the cut-out at the top of the Background tab brings the picture back to where it started.
In the same tab you set the Opacity. If the picture is see-through or zoomed out, you choose the colour behind.
The safe zone
The dashed frame on the stage shows the safe zone. Outside it the player lays its own interface over the clip: progress, title and comment bar. Important things belong inside the frame. The player keeps tools inside the zone by itself, even when they grow with their content.